If you want to know how to film underwater with an iPhone, the camera settings are honestly only one part of it. There are a lot of small settings on your phone that can completely change how your underwater video looks.
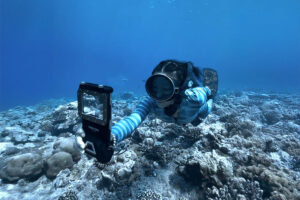
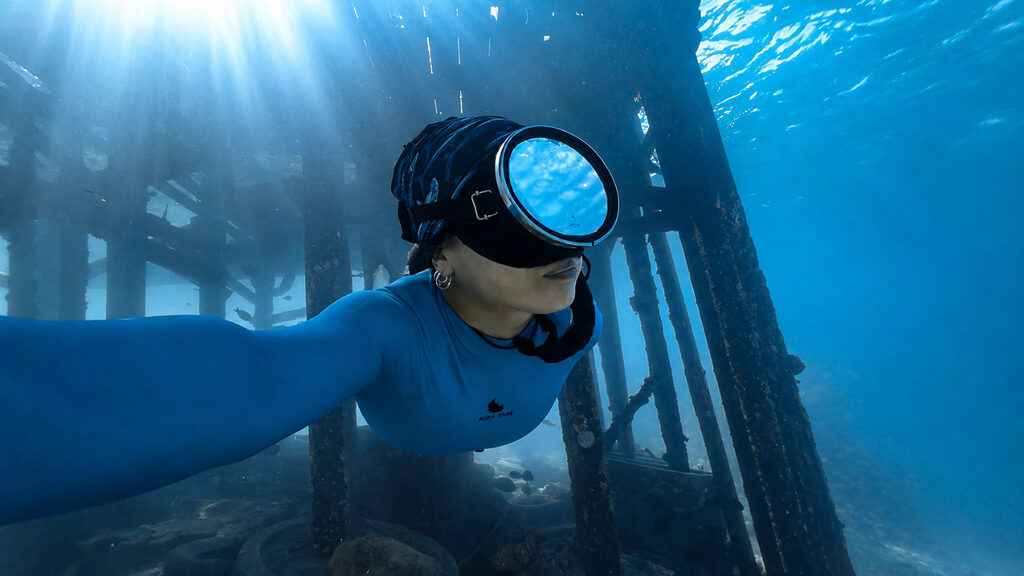
I currently film most of my underwater content with an iPhone 16 Pro inside a DIVEVOLK SeaTouch 4 Max Plus, mainly while freediving. Over the years I have traveled to many countries, from cold water in Norway to warm water in Dominica, and filmed whales, sharks, dolphins and all kinds of ocean situations with my phone, and these are the settings and little habits that I personally use the most.
The Best iPhone Settings for Underwater Video
Here is the quick version of what I normally use:
| What to Adjust | Recommended Setting | Why / When to Use It |
| Resolution & Frame Rate | 1080p / 60 fps for Instagram & TikTok; 4K / 60 fps for YouTube; 30 fps in lower light; up to 4K / 120 fps for strong slow motion | 60 fps allows smooth 50% slow motion, 30 fps helps in lower light, and 120 fps gives stronger slow motion but needs plenty of light. |
| HDR | Off | Underwater colors are easier to edit and stay more consistent when uploading or taking screenshots. |
| Lens | Mainly 0.5× and 1× | 0.5× for wide scenes; 1× for closer subjects and lower light. |
| Focus | Tap the subject constantly | Helps keep the subject sharp when your distance changes or when particles and bubbles confuse the autofocus. |
| Macro Control | On | Allows automatic close-focus lens switching. |
| Exposure | Auto, lower slightly when needed | Useful near the surface in very strong sunlight. |
| Action Mode | Usually Off | Useful for strong movement when there is enough light. |
These are not rules that will work exactly the same in every ocean. Clear tropical water can look completely different from green or murky water even if you use exactly the same iPhone settings. But this is where I normally start.
30 vs 60 vs 120 FPS Underwater
Your frame rate is basically how many frames your iPhone records every second. I normally use 60 fps underwater because it gives me the most flexibility later.
60 FPS: What I Use Most
For Instagram and TikTok, I normally film in: 1080p / 60 fps
I know people always say you should shoot everything in 4K, but honestly, for short Instagram and TikTok videos I normally do not need it. 1080p files are smaller, faster to edit and still look completely fine on social media. The biggest reason I use 60 fps is because I can slow the footage down afterwards. If I edit on a 30 fps timeline, I can slow 60 fps footage to around 50% speed and it still looks smooth.
For freediving footage, I use this all the time. A little slow motion makes body movements, bubbles, hair and animals look much nicer underwater.
30 FPS: When You Need More Light
If the water is darker, deeper or you simply do not have much light, I would switch to 30 fps. At a lower frame rate, the camera generally has more time available to expose each frame. That can help when the underwater environment is already dark. It does not magically make every video brighter because the iPhone is still automatically controlling things like shutter speed and ISO, but 30 fps gives the camera more room to work with less light. The downside is that you cannot make proper half-speed slow motion afterwards.
So I personally choose:
More light needed → 30 fps
Want slow motion → 60 fps
120 FPS: For Really Slow Motion
The iPhone 16 Pro can record up to 4K at 120 fps. Apple lists 4K Dolby Vision recording up to 120 fps on the iPhone 16 Pro. If you put 120 fps footage on a 30 fps timeline, you can slow it down to around 25% speed, which gives you a really nice 4× slow-motion effect.
But remember: the higher your frame rate, the more light you need, and underwater we are already constantly losing light. If I wanted to use 120 fps, I would do it in very bright, shallow water, preferably close to the surface with strong natural sunlight. If the water is dark and you try to shoot 120 fps, the iPhone may need to compensate more aggressively and your video can become noisy and lose detail.
How to Keep Your Subject Sharp Underwater
Tap to Focus Constantly Underwater
This one is extremely important. When I am recording underwater, I tap on my subject all the time. Sometimes literally every second.
Yes, the iPhone has continuous autofocus for video. But underwater there are particles, bubbles, backscatter, reflections and all kinds of random things floating between you and whatever you actually want to film. The camera does not know that the shark is important and the floating particle in front of it is not.
So I keep tapping the shark. Or the person.Or the fish. Or the coral. Whatever I actually want sharp. This becomes even more important when your distance is constantly changing. Maybe you are swimming toward somebody, then moving away again, then the animal turns and comes closer to you. I keep tapping so the iPhone knows exactly what I want it to focus on.
Why I Do Not Normally Lock Focus
You can press and hold the screen to activate AE/AF Lock. I personally almost never do this while freediving. The reason is that underwater I am constantly moving, and my subject is constantly moving too. If you lock your focus at one distance and then swim much closer, the focus point you locked may no longer be correct.
So for my style of underwater filming: Tap, tap, tap.
I would rather keep telling the iPhone where to focus than lock it and hope the distance stays the same.
Let the iPhone Switch to Macro When You Get Close
Another setting I normally leave enabled is Macro Control.
Go to: Settings → Camera → Macro Control
When you move very close to something and the normal 1× camera can no longer focus properly, supported iPhones can automatically switch to the Ultra Wide camera so they can focus from much closer. Apple says the iPhone can automatically switch to the Ultra Wide camera for macro photos and videos when you get very close to your subject. You will see the little flower icon appear. I normally leave automatic macro switching allowed because if I am very close to something, I would rather have a sharp image than a blurry one. This is especially useful for small fish, coral details, nudibranchs or anything where you want to get really close.
The downside is that you can sometimes see the lens change inside your video. The framing suddenly moves a little and the image looks different because the phone has changed cameras. If I know I am going to film something very close, sometimes I will let the camera switch first and then start recording afterwards. But generally, I still prefer having this option available underwater.
Which iPhone Lens Should You Use Underwater?
For almost all my underwater videos, I use: 0.5× or 1×
I rarely use 2× or 5× underwater.
0.5× for Wide Underwater Scenes
0.5× is probably the lens I use the most when filming people, large animals or beautiful underwater environments. It gives the video a much wider and more immersive feeling.
For example, if I am filming another freediver, whales, sharks, mantas or anything relatively big, I normally want to see both the subject and the environment around them. That is why I like 0.5× so much. It gives you a wider view and makes the perspective of the video look more interesting.
I mean, just try it yourself, film the same thing once with 1× and once with 0.5×, then compare the two videos and see which one you like better.
1× for Better Quality and Closer Subjects
If the subject is already close enough or I want a cleaner, more detailed image, I normally use 1×. The main camera also handles lower light better than the Ultra Wide camera, so when the water becomes darker, 1× is often the safer choice.
Why I Rarely Use 2× or 5×
If I want a closer shot underwater, I normally swim closer instead of zooming in. The more water there is between you and your subject, the more contrast and color you lose, so physically getting closer normally gives you a much cleaner image than simply using 2× or 5×.
Of course, this does not mean chasing or disturbing marine animals just to get a video.
Light, Exposure & Color Underwater
Turn HDR Off for Underwater Video
This is something I only properly realized quite recently, and honestly it made my editing life so much easier. For underwater video, I recommend turning HDR off.
Go to: Settings → Camera → Record Video → HDR Video → Off
The iPhone can record video in Dolby Vision HDR, which allows a wider brightness range. But underwater, I personally do not like working with it because it makes the video too bright or too contrasty sometimes. I have had footage that looks beautiful and bright in my original iPhone video, then I upload it somewhere, edit it in another app, or take a screenshot from the video and suddenly the colors and brightness look different.
Sometimes the social media platform converts the HDR video and the result becomes darker than what I originally saw. Since turning HDR off, my underwater footage has been much more predictable for editing and social media. And honestly, I also just prefer how the underwater colors look this way. So this is one of the first settings I would change.
Lower Your Exposure When the Sun Is Too Strong
Sometimes underwater we actually have the opposite problem: too much light.
If I am filming really shallow around noon and the sun is extremely strong, the surface can become completely overexposed. Skin, bubbles and bright water can lose all detail. One of the things I really like about filming with an iPhone underwater is that I can manually reduce the exposure.
With the DIVEVOLK touchscreen housing, I can do this while I am already underwater. Tap once on your subject. You will see a yellow focus box with a little sun icon next to it. Then drag your finger down slightly. You will immediately see the image become darker.
I normally only reduce it a little bit. I do not want the whole video to become dark—I just want to protect the brightest parts. This is honestly one of the advantages I really like about filming underwater with my iPhone compared with many action-camera setups. I have much more control over exactly what the camera is doing while I am underwater.
Stay Close Because Underwater Color Disappears Fast
One of the biggest differences between filming underwater and filming on land is color. Water absorbs different colors of light as you go deeper. Red disappears first, then orange and yellow, and eventually your footage becomes increasingly blue or green.
This is why an underwater video taken one meter from your subject can look dramatically better than the same subject filmed ten meters away. There is simply less water between the camera and the subject.
For freediving with natural light, I always try to:
- stay relatively close
- film shallow when possible
- use natural sunlight
- avoid shooting very distant subjects
That alone can improve your underwater videos more than changing ten camera settings.
If you are regularly scuba diving deeper, I think investing in proper video lights makes a lot of sense. When the natural red and warm light is gone, editing can only do so much. A dive light puts actual light back onto your subject, so your camera can record the missing colors again. Of course, the light only works within the distance that the beam actually reaches. It will not magically restore the color of a shark twenty meters away.
Clear Water vs Murky Water
You can use exactly the same iPhone, exactly the same settings and exactly the same editing process, and the videos can still look completely different.
In very clear tropical water:
- colors look cleaner
- the subject stays sharp from further away
- there is less visible backscatter
- editing is easier
In murky or green water:
- particles become much more visible
- contrast disappears faster
- your subject looks flatter
- autofocus can get confused more easily
- colors become harder to correct
There is no camera setting that completely fixes bad visibility. That is why I always tell people not to compare one bad underwater shooting day with somebody else’s perfect Maldives video and think their camera is broken. Sometimes the ocean is simply the ocean.
If you are deciding whether an iPhone or an action camera works better in those different conditions, I wrote a full comparison here:
👉 iPhone vs Action Camera Underwater: Which Is Better?
How to Make Your Underwater Videos More Stable
Stabilization is extremely important. Even if the iPhone stabilization is good, the best footage starts with how you move underwater.
I always try to:
- move slowly
- kick gently
- hold the housing with two hands when possible
- keep my arms stable
- avoid sudden turns
- keep recording for a little longer instead of immediately stopping the clip
If I am changing direction, I try to turn my whole body instead of quickly moving only my wrists. Small camera movements look much bigger when you watch them afterwards.
Is Action Mode Useful Underwater?
Yes, but I do not use it all the time. Action Mode gives your iPhone much stronger electronic stabilization.
It can be helpful if:
- you are swimming really fast
- you are following an animal
- you are kicking hard
- you are filming with one hand
- the water is rough
- your footage is otherwise too shaky
But there are some downsides underwater. First, Action Mode crops the image because the camera needs extra room around the frame to stabilize the footage. So you lose some of that really wide underwater feeling. Second, Action Mode needs more light.
Apple specifically says Action Mode works best in bright light and records at a maximum resolution of 2.8K. Underwater we already lose light very quickly, so in darker water I normally prefer leaving Action Mode off.
For me:
Bright shallow water + lots of movement → Action Mode can be useful
Deeper/darker water → I normally leave it off
A Little More Weight Can Help—If You Are Experienced
For experienced freedivers who already understand their own weighting, I also find that being slightly more weighted can make filming in shallow water much easier and more stable. You do not float up as aggressively, so you can hold your position better while filming. This is something I personally use. But I would not recommend beginners randomly adding extra weight just for filming.
You need to understand your buoyancy first and still remain safely positively buoyant at the surface. Overweighting increases the effort needed to return to and remain at the surface. And of course: never freedive alone.
My Underwater iPhone Setup & DIVEVOLK Discount Code
My current setup is very simple:
- iPhone 16 Pro
- DIVEVOLK SeaTouch 4 Max Plus
- DIVEVOLK wide-angle lens
The biggest reason I use the DIVEVOLK housing is the full touchscreen control. I can tap to focus, change lenses, change resolution and frame rate, lower exposure, use different apps, review my footage while underwater and change camera settings underwater.
Basically, I can still use my iPhone almost the same way I would on land. That is especially important for all the things I talked about in this article because I am constantly changing things while I film. DIVEVOLK currently rates the SeaTouch 4 Max Plus housing waterproof to 60 m / 200 ft, with sensitive touchscreen operation rated to 30 m / 100 ft. I have been using DIVEVOLK housings for years now, and personally this is still the setup I trust with my own iPhone underwater.
If you are interested in the same touchscreen underwater phone case I am using, here is a full review I wrote after 3 years of diving with it: 👉 Divevolk SeaTouch 4 Max Plus Full Review
If you’re ready to order now use my DIVEVOLK discount code DIVETIAN6 at checkout to get:
- 6% off your entire order
- a free Protective Cover
- extra gifts for orders over $500, including a Travel Case and L-shaped handle bracket
👉 Use code: DIVETIAN6
👉 Order through my DIVEVOLK discount link
The extra freebies usually won’t show on the checkout page, but they will be automatically added to your order by DIVEVOLK.
If you want to compare it with other underwater phone housings, I wrote a full guide here:
👉 Best Underwater Phone Case for Photography: Which One Is Worth It?
How to Edit Underwater Videos on iPhone
Even when I get the settings right, I still normally color grade my underwater footage afterwards. Underwater colors change so much depending on the depth, sunlight, water visibility and distance that I do not use one exact preset for every video. I normally use Lightroom Mobile first to correct the color, then bring the clips into CapCut or Edits to make my final Reel or TikTok.
I wrote my entire workflow here:
👉 How to Edit Underwater Videos on iPhone: Color Grading in 5 Mins
And if you also take photos—or use frames from your underwater videos as photos—I have another guide here:
👉 How to Edit Underwater Photos on iPhone: My Workflow as a Content Creator
FAQ: How to Film Underwater With an iPhone
Can You Film Underwater With an iPhone?
Yes, but I would always use a proper underwater housing.
Do not rely on the iPhone’s normal water resistance for snorkeling or freediving. A real underwater housing protects the phone and allows you to actually control the camera properly underwater.
What Are the Best iPhone Settings for Underwater Video?
For Instagram and TikTok, I normally use:
1080p / 60 fps + HDR Off
For YouTube:
4K / 60 fps + HDR Off
If the water is darker and I do not need slow motion, I switch to 30 fps.
Is 30 or 60 FPS Better Underwater?
I prefer 60 fps most of the time because I can slow the video down to 50% afterwards. If there is not enough light, 30 fps can be the better choice.
Should I Use 120 FPS Underwater?
You can. The iPhone 16 Pro offers up to 4K/120 fps. I personally rarely use it because underwater it needs a lot of light. If you want really strong slow motion, use it in bright, clear, shallow water where you have enough sunlight.
Should HDR Be On or Off for Underwater Video?
I recommend Off. In my experience, underwater HDR footage can behave differently after editing, uploading or converting for social media, and I personally get much more consistent colors with HDR turned off.
Should I Use 0.5× or 1× Underwater?
I use both. 0.5× is great for people, large animals and wide underwater scenes. 1× normally gives better image quality, especially when the light gets lower. I rarely use 2× or 5× because I would rather swim closer and reduce the amount of water between me and the subject.
Why Is My Underwater iPhone Video Blurry?
The most common reasons I see are:
- the camera focused on particles instead of your subject
- you changed distance but did not tap to refocus
- the subject is too far away
- there is not enough light
- the water visibility is bad
- you are too close for the current lens to focus
- your phone or housing lens is dirty
Is Action Mode Good Underwater?
It can be useful if you are swimming fast or getting a lot of camera shake. But because it crops the image and needs more light, I normally only use it in bright, shallow conditions.
Do I Need Dive Lights for iPhone Underwater Video?
For shallow freediving and snorkeling in good natural light, usually not. If you regularly scuba dive deeper or film in darker environments, video lights can make a huge difference because they put real color back onto your subject.
My Final Tip
There is no one perfect setting for every ocean. The more you film underwater, the more naturally you start understanding what your camera needs in different light, depths and water conditions. Good light, close distance, stable movement and knowing where your camera is focusing will almost always give you much better results than simply having the most expensive gear.