Editing underwater videos and photos on iPhone can be tricky when footage comes out too blue, green, or flat – but with the right workflow, you can fix colors and export really cool results. This guide shows you exactly how to edit underwater videos and photos on iPhone, from color grading to exporting clips ready for Instagram and TikTok.
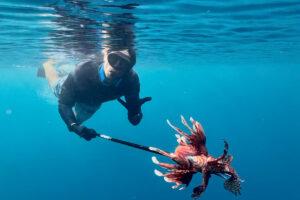
Don’t have underwater shots yet? Before editing, you need good underwater phone shots. Here’s how I shoot underwater photos & videos on iPhone: 👉How to Take Underwater Photos with an iPhone
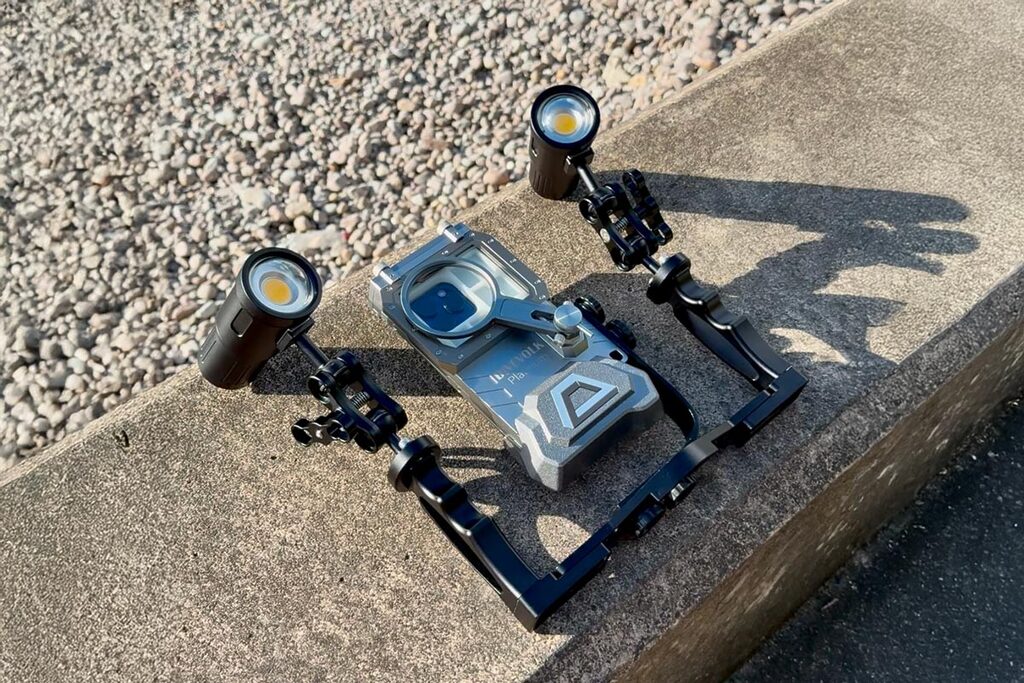
I shoot almost all my underwater content on an iPhone 16 Pro in a DIVEVOLK SeaTouch 4 MAX Plus housing, and I edit everything in Lightroom Mobile (Premium) and CapCut or Edits because it works great for both underwater photos and videos. If you’re wondering which underwater phone case I trust after 3 years of freediving and creating underwater content, I wrote a full review here: 👉Divevolk SeaTouch 4 Max Plus Review
If you plan to upgrade your gear, grab my exclusive deal 👉DIVEVOLK Discount Code to save 6% and get free accessories like travel cases.
Below is my simple, repeatable workflow for how to color grade underwater footage on iPhone. It’s fast, beginner-friendly, and flexible—you can adjust the sliders until it looks just right.
Color Grading Underwater Footage Setup
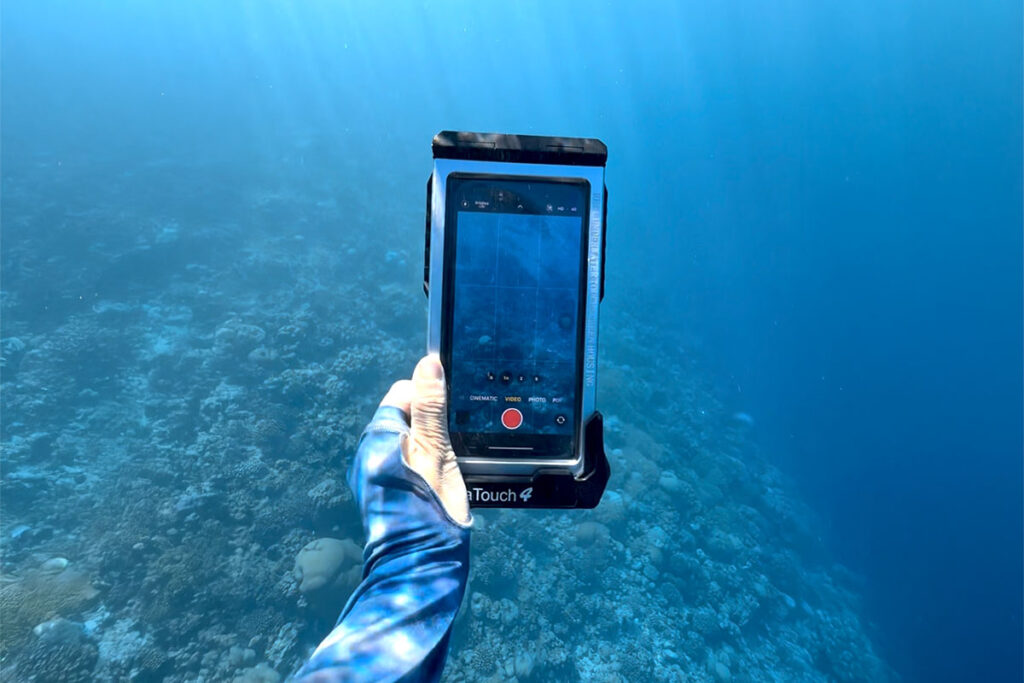
Camera: Your smartphone (mine is an iPhone 16 pro)
Housing: DIVEVOLK SeaTouch 4 MAX Plus (full touchscreen access, waterproof to 60 m / 200 ft)
App: Lightroom Mobile for color grading & Capcut and Edits for turning the clips into short-form videos
Step-by-Step iPhone Underwater Color Grading
These are just starting points, underwater video editing on iPhone has no real rules. Every dive, depth, and water color is different, so feel free to nudge the sliders until it feels right. This is exactly how to color grade underwater footage on your phone in just a few minutes
1) Import your shot
Open Lightroom Mobile, add your photo or video, and select it for editing.
2) Correct the colors first (tab “Color” → “Color Mix”)
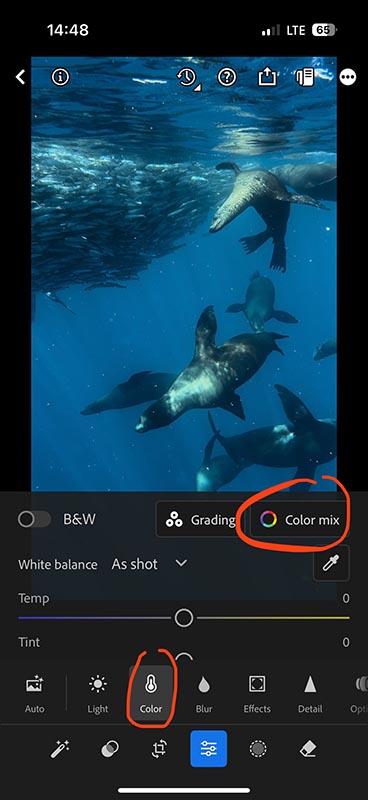
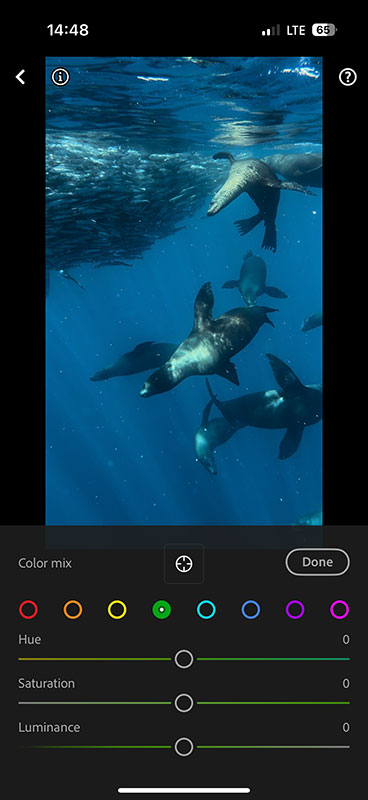
Underwater footage usually has too much aqua and green, so we’ll start there.
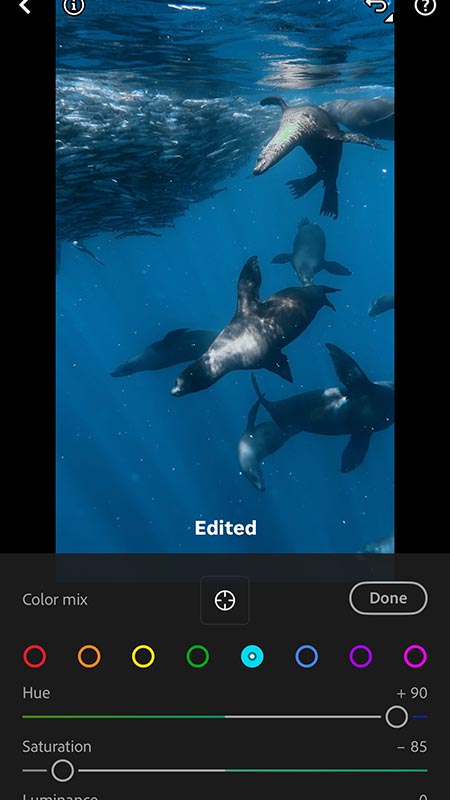
Aqua
- Hue: slide right to push the water toward a cleaner teal/blue.
- Saturation: slide left to reduce that heavy blue cast.
In this example my setup is: Hue +90, Saturation −85. Adjust until tones and the subject look natural.

Green
- Hue: slide all the way to the right.
- Saturation: slide all the way to the left.
If needed, lower Luminance a touch to keep the water from looking neon.

Purple / Magenta (only if needed)
If your underwater video looks purplish, drop Saturation slightly for Purple and Magenta.
Tap “Done” when the color feels right.
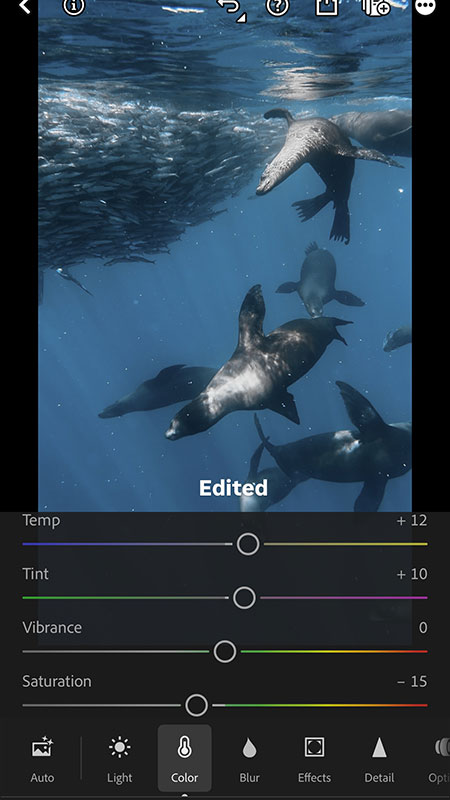
3) Adjust White Balance (Tab “Color” → “White Balance”)
- Temp: a gentle push warmer (→) to restore lost reds/yellows. In this example I landed around +12, but sometimes I need to adjust it to a colder tone, depending on the actual photo you have.
- Tint: slide right if things feel too green. In this example I landed around +10.
- Saturation: lower slightly if the image feels oversaturated. In this example I landed Saturation −15.
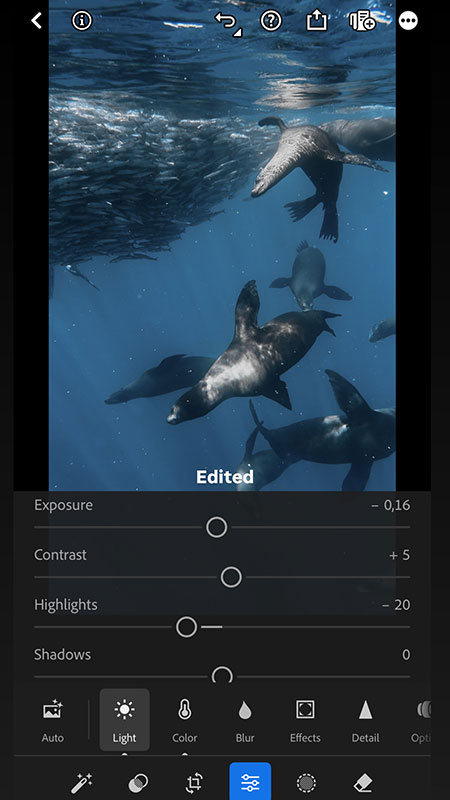
4) Refine the Light (Tab “Light”)
Small, deliberate moves make a big difference when editing underwater footage.
- Exposure: a tiny pull left to protect highlights. Mine is normally between −0.20 to −0.05; in this example I set it to −0.16.
- Contrast: +5 for a little pop, you can add more if you feel like it.
- Highlights: −20 to recover detail in bright water and reflections.
- Blacks: −5 for depth.
💡 Tip: If you pull “Blacks” down and things feel too heavy, go back to “Color” and reduce the Saturation, then return to Light to fine-tune.
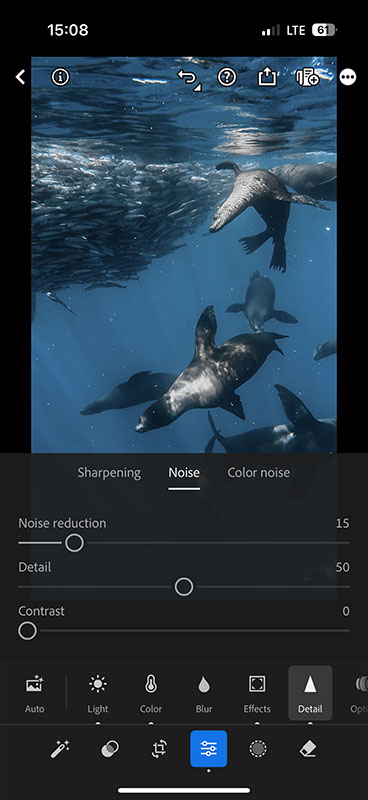
5) Texture, clarity & cleanup (Detail & Effects)
- Detail → Sharpening: around +50
- Detail → Noise Reduction: 15–40 if the shot has backscatter/particles
- Effects → Texture: +5
- Effects → Clarity: +25 (don’t overdo it; clarity can amplify backscatter)
These numbers are just right for this example photo. It might look very different on yours depending on the light, depth, and color in your underwater footage. Play with it so you can feel the difference of each option and find the mix you like most.

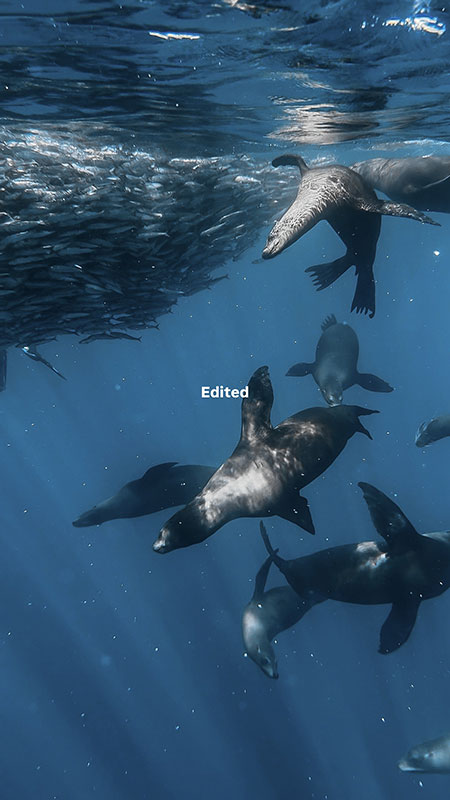
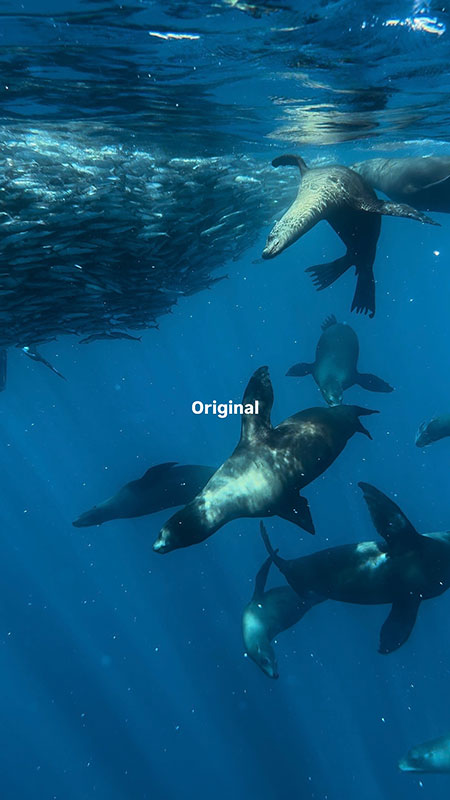
6) Export your underwater shot
Tap “Export” → “Save Copy to Device”. Do a quick before/after—if the water looks clean, the subject has life, and nothing looks overcooked, you’re done.
What to do with your edited underwater videos?
Once your clips look good, the next step is turning them into viral Instagram Reels or TikTok videos. After I finish the color grading in Lightroom Mobile, I usually bring the edited clips into CapCut or Edits to turn them into short-form videos. For me, Lightroom is where I fix the underwater colors, and CapCut / Edits is where I cut the clips, add music, text, transitions, and make the final video ready to post.
Here’s my full workflow on how to shoot, edit, and post underwater content:
👉 Underwater Photography & Videography Tips for Instagram & TikTok
Depth & lighting tips for color grading underwater footage
Phones do great from 0–10 m (0–33 ft) without video lights. Go deeper and you’ll lose red/yellow fast; Lightroom can only bring back what’s still there. If you’re regularly below 10 m, consider a dive light to feed your sensor real color.
If you want to take better underwater shots with your iPhone, check out my full guide here:
👉 How to Take Underwater Photos with an iPhone
FAQs — Editing Underwater Videos on iPhone
Q: What app should I use to edit underwater videos on iPhone?
A: I recommend Lightroom Mobile (Premium) for precise color grading. You can also use LumaFusion or VN for more advanced editing.
Q: Why does underwater footage look green?
A: Water absorbs warm light (reds/yellows) quickly, so images tend to turn blue and green. Color grading fixes this.
Q: Can I edit underwater videos on iPhone without accessories?
A: Yes, but starting with good footage (stable, well-lit) always makes editing easier.
Q: What export settings are best for Instagram?
A: Export at 1080p/4K, H.264 or HEVC, and 30–60fps depending on your platform.
My Tips for you
Keep it simple. Start with Color Mix, set White Balance, shape Light, then add a little Detail and Effects. The more you practice, the faster (and better) it gets—and soon you’ll have a reliable workflow for bringing any dive clip back to life.
This is just one way of showing how to color grade underwater footage with nothing more than your phone. The beauty of Lightroom Mobile is that you can experiment endlessly, create your own presets, and develop a look that feels unique to your style. Don’t be afraid to play with the sliders and push the colors until you find what works best for your eyes.
If you’re new to underwater editing and want an easy entry point, I hope this short color grading tutorial gives you the confidence to start. Once you understand the basics, you’ll be able to fix green or blue water, recover lost reds and yellows, and make your footage look vibrant and natural in just a few minutes.
Now that you know how to edit underwater videos on iPhone — from color grading to final export — you’ve got everything you need to turn your raw dive footage into stunning clips. Once your underwater footage is edited, learn how to post optimized clips for Instagram & TikTok:
👉 Underwater Photography & Videography Tips for Instagram & TikTok
After following this workflow, you should be able to transform raw iPhone underwater shots into content you actually want to share on your social media 🙂
DIVEVOLK Discount Code: DIVETIAN6
I’ve been using the DIVEVOLK SeaTouch 4 Max Plus for over 3 years across freediving, snorkeling, and underwater filming all over the world. Here I have created a dedicated page with all the details on how to claim your gifts: 👉DIVEVOLK Discount Code DIVETIAN6 To Get 6% OFF + Free Gifts
However, if you’re ready to order now use my DIVEVOLK discount code DIVETIAN6 at checkout to get:
- 6% off your entire order
- a free Protective Cover
- extra gifts for orders over $500, including a Travel Case and L-shaped handle bracket
👉 Use code: DIVETIAN6
👉 Order through my DIVEVOLK discount link
The extra freebies usually won’t show on the checkout page, but they will be automatically added to your order by DIVEVOLK.
Just a quick note: I may earn a commission if you order through my link, but this is the exact underwater phone case setup I use myself.