This is probably the first issue beginners encounter: you’re so excited to book that trip, you pack all your diving gear, you go diving, and in the moment everything feels amazing… but then later, when you finally check your camera roll, you realize your underwater iPhone photos blurry after a dive. I totally get that, because when I first started using my iPhone to film underwater, I had exactly the same problem. After a few years of diving, I realized these are the real causes.
If you’re here because you’re thinking why are my underwater photos blurry or you’re desperately googling underwater video blurry fix, I get it. This is probably the first issue most beginners run into.
In this guide, I’ll explain exactly why it happens underwater and how I fix it step by step. And don’t worry, you don’t need a fancy camera setup for this, because most of the blur comes from a few super fixable things once you know what to look for.
Why Are Underwater iPhone Photos Blurry?

Before we blame your phone, we need to be fair: underwater is a tough environment for any camera, because the water changes the light, the contrast, and even the way your lens “sees” the scene compared to shooting in air. Even professional cameras with expensive housings that underwater photographers use can struggle too when the conditions aren’t right, and if the visibility is bad or the light is low, their footage can look soft and hazy as well. So if your iPhone clips look blurry, it doesn’t automatically mean you filmed it wrong or your phone is the problem.
1. Water Naturally Reduces Sharpness
Underwater, you’re not filming through air anymore, you’re filming through water, and water is basically never “empty.” There’s always tiny stuff floating around, like little particles, plankton, microbubbles, sand that gets stirred up by fins, and sometimes even just the movement from you and the people around you, and all of that sits between your camera and your subject whether you notice it or not.
That’s the part most people don’t realize at first, because your iPhone can still focus, but the water is scattering the light and killing the contrast, so even when the focus is technically correct, the footage still doesn’t feel sharp the way it does on land. And that’s why your clips can look kind of milky or soft, like there’s a thin layer of haze over everything, even when you swear you did everything right.
2. Light Disappears Faster Underwater
Light drops fast underwater, and it’s honestly not just a simple “it gets darker” situation. The light down there becomes flatter, the shadows don’t look the same, and the whole scene loses that clean contrast you’re used to on land, plus the colors start disappearing one by one, so even a spot that feels bright to your eyes can still look kind of dull on camera.
When that happens, your iPhone tries really hard to save the shot, and it starts doing things in the background like boosting ISO, smoothing out noise, and applying a bunch of processing to make the footage look usable. This is the moment where the phone goes into what I call “compromise mode,” and that’s why the final video often ends up looking a bit mushy and soft, even when you feel like it should be bright enough.
Now let’s move into the stuff you can actually control, because this is where your footage starts getting good fast.
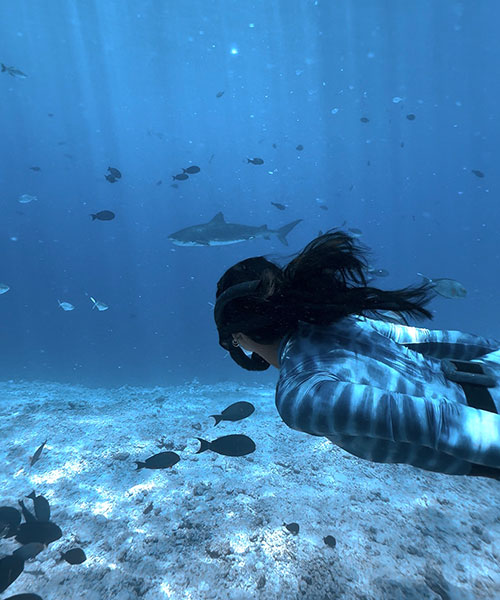
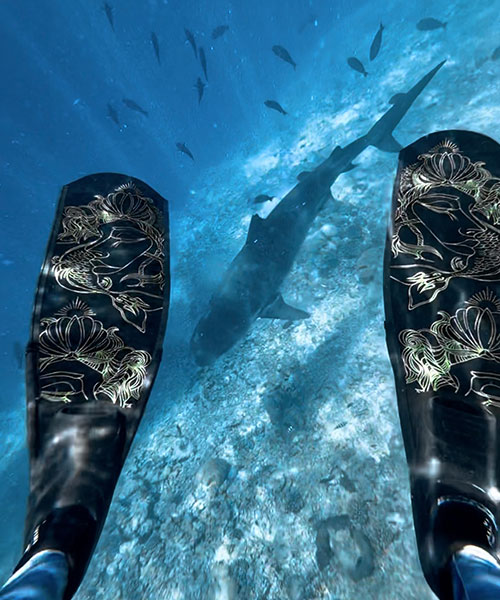
3. You’re Too Far From Your Subject
I honestly think this is the most common reason your underwater iPhone photos and videos look blurry, and it’s simply distance.
So if you’re snorkeling at the surface and filming something 5 to 6 meters below you, it will almost never look crisp, and it’s the same if your subject is 5 to 6 meters horizontally away. It’s not that your phone “can’t focus,” it’s that the camera can’t magically shoot through that whole column of water and still keep contrast and detail, especially when the light is already dropping and everything starts looking more washed out.
And I know the instinct is to use 3x or 5x zoom to pull the subject closer, but underwater that usually makes things worse instead of better, because digital zoom is basically your phone cropping the image and trying to rebuild detail that isn’t really there. So you end up amplifying the haze and noise, every tiny hand movement looks shakier, and the footage gets even softer. If you want sharp underwater footage, the fix is annoyingly simple but also kind of freeing once you accept it: you have to get close, like closer than you think, and let your fins do the zoom instead of your fingers.
4. Your Lens or Underwater Phone Case Is Dirty, Foggy, or Scratched
Sometimes it’s honestly not the ocean at all, it’s your setup, and this one is painful because you can do everything “right” in the water and still come back with blurry footage. The annoying thing is you might not realize it at first, it just makes everything look a little soft and washed out, like there’s a thin film over your footage.
The most common blur killers are super basic things like sunscreen fingerprints on your phone lens, a tiny smear on the underwater phone case window, or micro droplets trapped inside the case, and once those droplets are there, they create a hazy look that ruins sharpness no matter how good your filming is. Fogging is another big one, especially when your phone is warm and the water is cooler, because condensation builds up inside the housing and suddenly your whole dive looks like it was filmed through a bathroom mirror, and if the window is scratched, that can soften your footage in a way you can’t really fix later.
The frustrating part is you often don’t notice it until you’re already in the water, so a quick lens and window check before you jump in is one of those small habits that saves you on so many dives.
5. You’re Not Using a Proper Underwater Phone Case
Filming underwater without a proper underwater phone case is kind of a gamble, because you’re trusting your phone to survive the water while also expecting sharp footage, and that’s just not a realistic combo for most dives, especially since salty water isn’t safe for your phone either.
If you don’t use any case at all, it’s obviously risky, and the touchscreen usually won’t behave properly underwater, so you end up fighting the phone instead of focusing on filming. A pouch or soft bag can be okay for surface snorkeling if you’re careful, but it often feels unstable and can create weird distortions, and it’s also harder to keep clean once you’re moving around in the water.
A real underwater phone case makes everything more consistent, because it’s easier to hold steady, stay close to your subject, and actually use your phone like a camera underwater instead of treating it like a fragile object you’re scared to touch.
6. Wrong Focus Behavior
Underwater, your phone can look like it’s focusing perfectly, but sometimes it’s locking onto the wrong thing, and that’s why you come up and realize the whole clip feels kind of soft even though it looked fine on your screen. There’s always stuff moving between you and your subject underwater, so instead of focusing on the fish or coral you care about, it might grab tiny particles, a bubble, your reflection on the underwater phone case window, or the background behind it.
That’s why tapping to focus matters so much underwater, because it tells your phone what you actually want sharp instead of letting it guess.
7. Not Enough Light
When the light is low underwater, your phone starts working overtime, and that’s where the quality drop usually happens. The phone will push the ISO up to make the video brighter, but higher ISO also brings in more noise, and then the iPhone tries to hide that noise by smoothing it out, which is exactly how you end up losing fine details and getting that slightly smeared, plastic looking softness. And on top of that, in low light the shutter can slow down, especially in video, so any little movement from your hands, the current, or your subject turns into motion blur, even if you feel like you were filming pretty steadily.
That’s why the exact same reef can look crisp and beautiful at noon, and then suddenly look soft and messy in late afternoon, even if you’re filming in the same spot and the water looks “clear” to your eyes. It’s not that you suddenly forgot how to film, it’s just that underwater light changes fast, and your iPhone reacts to it in a way that often sacrifices sharpness to keep the image bright enough.
8. Digital Zoom: 0.5/1/3/5x Zoom
This one confuses a lot of people because it feels like zoom should help underwater, and it also feels like ultra wide should automatically look “more epic,” but both of them can mess with sharpness in different ways if you’re not using them with the right distance.
Digital zoom is the obvious trap, because your iPhone isn’t actually pulling the subject closer with real optical magic, it’s basically cropping into the image and then trying to rebuild the details, and underwater that usually turns blurry fast. You’re magnifying haze, noise, and every tiny shake from your hands or the water movement, so even if the subject looks bigger on your screen, the footage often looks softer and dirtier when you watch it later.
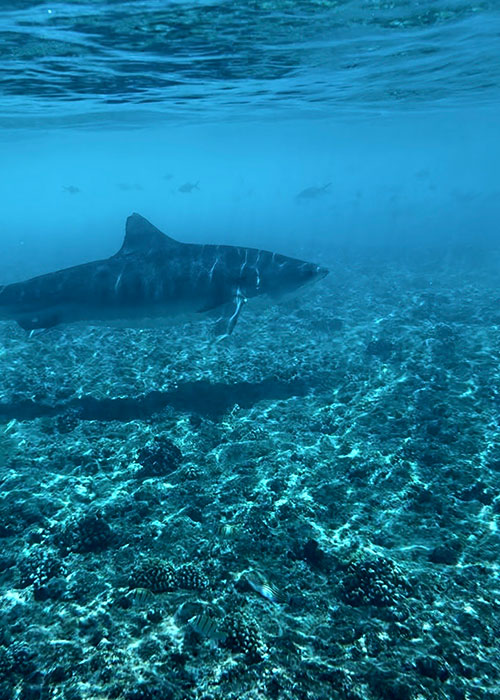
Ultra-wide, the 0.5x lens, is a different story because it can be absolutely amazing underwater, but only when you’re close enough for it to work. I personally like to use 0.5x when I’m filming something big like a diver, a manta, or a whale, and I want to capture the whole scene and that “wow” feeling around it. But if you’re still far from the subject, everything ends up looking small and far away, and you also end up filming through more water, so the haze shows up even more and the whole shot feels less sharp.
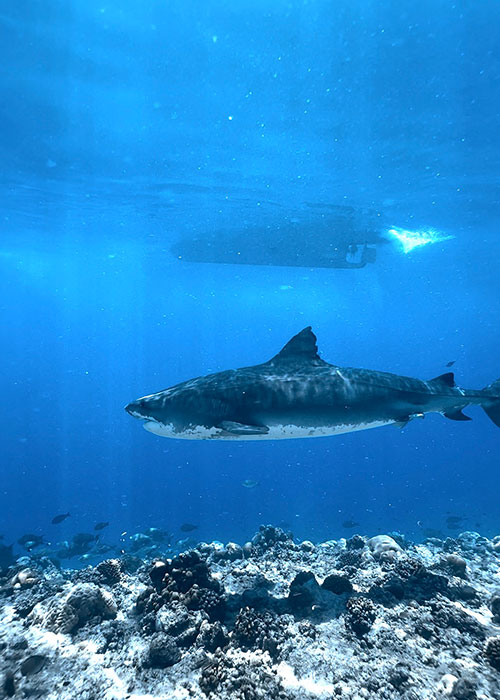
9. Shooting Through Particles, Surge, Backscatter
If the water has a lot of particles floating around, your iPhone can easily focus on that “snow” instead of your subject, and then the footage just looks messy. And if there’s surge or current and you’re getting pushed around, even small micro-shake adds up underwater and turns into motion blur.
This doesn’t mean you can’t film, you just need to adjust a little. Get closer so there’s less water between you and the subject, slow down and stabilize more, and if you’re using a light, aim it carefully so you’re not lighting up all the particles right in front of your lens.
How to Fix Blurry Underwater iPhone Photos & Videos
Here’s the good news, because I know this whole blurry footage thing can feel super frustrating in the beginning. And there are a few small tips for you, start with the first few fixes below, because they usually solve 80% of the blur.
Fix #1 Clean and de-fog your setup properly
Use a clean, dry towel to wipe your phone’s camera lenses properly, and don’t forget to clean the window of your underwater phone case too.
Try to set up your phone inside the case before you get on the boat, in a cool and dry place. If you’re on a liveaboard, do it in your room, because if you build your setup when the air is hot and humid, or you’re already sweaty on deck, you can trap wet air inside the case. It can look totally fine at the start, and then halfway through the dive your footage suddenly gets blurry, and by then it’s too late.
You can also add an anti-fog insert, and they’re honestly super useful. Action cameras use them all the time, and some underwater housings have space for them too, so if your case supports it, it’s worth using.
Fix #2 Get closer than you think
I know this sounds obvious, but it’s honestly the biggest underwater photos blurry fix of all time. Dive closer, then get closer again.
This is how I usually choose lenses. I use 1x for fish, coral, and anything mid-size where I want the details to look crisp, and I use 0.5x for bigger subjects like a diver, a manta, or a whale, or when I want that wide reef scene and the whole “wow” feeling in one shot.
I love 0.5x underwater, but only when you’re close enough for it to work, because ultra-wide plus distance can still look soft when you’re filming through too much water. So yes, use 0.5x and 1x a lot, but the real magic is always proximity.
Fix #3 Force focus and exposure
This alone can take your footage from “meh” to “clean,” because underwater your iPhone doesn’t always know what you want it to focus on, and it changes fast.
Tap to focus all the time, especially with moving subjects. I do it constantly, like I’ll tap the fish, tap again, tap again, because underwater the scene can shift in seconds and the phone can easily grab the wrong thing.
If you’re in a steadier moment, locking AE/AF can help a lot too. It’s not always perfect for freediving since you’re moving and changing distance, but for scuba or calmer shots it stops the phone from hunting focus mid-shot and keeps your footage more stable.
And don’t be afraid to lower the exposure slightly. I use this a lot because it protects highlights and makes the video look more cinematic, and overexposed underwater clips often look washed out, and when it’s washed out it also feels less sharp.
If you want the exact iPhone settings setup I use for content (Instagram and TikTok), you can check this guide here:
👉 Best iPhone Settings For Underwater Photos & Videos (Instagram & TikTok Guide)
Fix #4 Improve light
There are basically two paths here, either you use no light and work with the sun, or you bring a video light and make your life way easier.
If you don’t have a light, try to film when the sun is up instead of late afternoon, stay a bit shallower when you can, and keep the sun behind you, or at least not directly in your face.
If you do use a video light, it’s honestly one of the biggest upgrades for underwater phone footage. A good light gives you more detail and better color, and it makes editing much easier later because you’re not trying to save a dark blue clip in post. You’re also capturing more color in your iPhone videos from the start, which helps a lot when you color grade.
If you’re curious how I color grade and edit my underwater iPhone videos, check this guide:
👉 How To Edit Underwater Videos On iPhone: Color Grading In 5 Mins
Fix #5 Stabilize your body
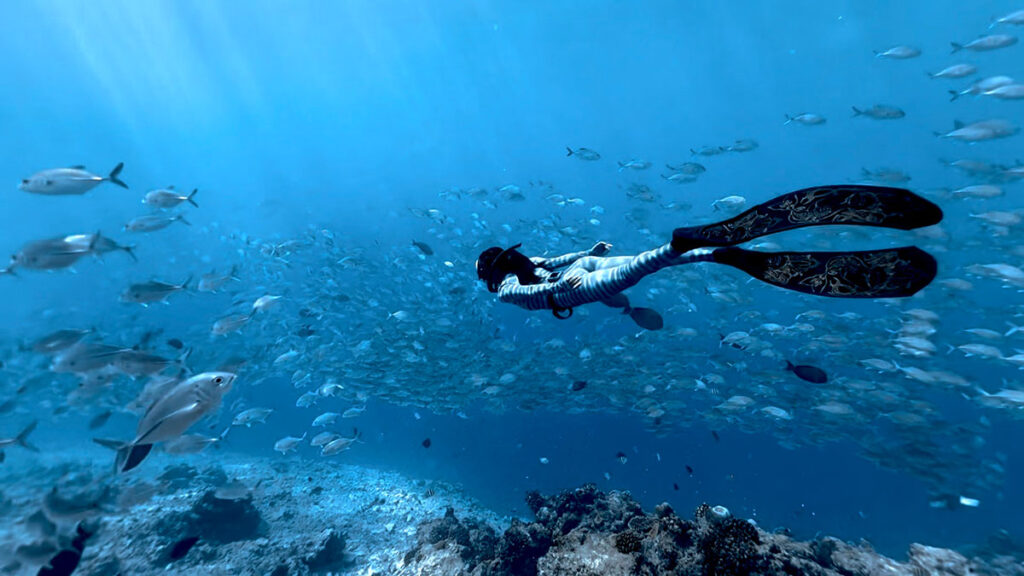
Underwater filming is basically a body control sport, because even tiny movements that don’t feel like much in the water can look shaky on video, and shaky footage always feels less sharp.
A few things that actually work are moving slow like you’re in underwater slow motion, avoiding sudden fin kicks while you’re recording, using a glide phase (especially for freediving), and keeping your elbows tucked so your hands are more stable. Holding the phone with two hands helps a lot too, not just for stability, but also because it’s easier to tap to focus again while you’re filming.
And if you’re freediving and you can’t really do hands-free filming (same), I usually press record before I dive down, start filming once I’m at a depth where I’m not constantly equalizing, and then I just focus on staying calm, stable, and close to the subject.
Fix #6 Choose the right video settings
There’s no one perfect setup for everyone, but here’s what I actually do, and it keeps things simple without overthinking it.
For 4K versus 1080p, a lot of people love filming everything in 4K, but I’m often on 1080p because storage is real life, it’s faster to edit, and for Instagram and Tiktok it’s honestly enough. If you’re filming for YouTube long-form and you want extra room to crop in later, then 4K is really nice to have.
For frame rate, I use 60fps a lot when there’s enough light, like morning dives with sun or shallow reefs, because it looks smoother and gives you more options if you want slow motion. But in low light, cloudy days, or rainy late afternoons, 60fps can actually look softer because the phone needs a faster shutter and higher ISO, so that’s when I drop to 30fps.
And for HDR, I use it a lot too. Sometimes it looks amazing, but sometimes highlights can get a bit weird and the footage starts looking unnatural, so if something feels off on a dive, try turning HDR off and compare. Underwater light changes so much from place to place that it’s always worth doing a quick test.
Fix #7 Use A Proper Underwater Phone Case
If you want consistently sharp underwater iPhone video, a solid underwater phone case helps more than people think, because it makes everything easier to control and way more repeatable from dive to dive. The lens port stays stable and clean, it’s easier to hold steady with one or two hands, and depending on the housing you can still tap to focus and adjust settings instead of just hoping the phone gets it right on its own.
It also reduces those random distortions you can get from soft pouches, where the window shifts a little or the footage just looks slightly “off” even when you did everything right. This is the point where your gear actually supports your technique, instead of fighting it, and that’s when your footage starts looking sharp more consistently, not just on your luckiest dives.
My Exact Underwater Camera Setup For Sharp Underwater iPhone Photos and Videos
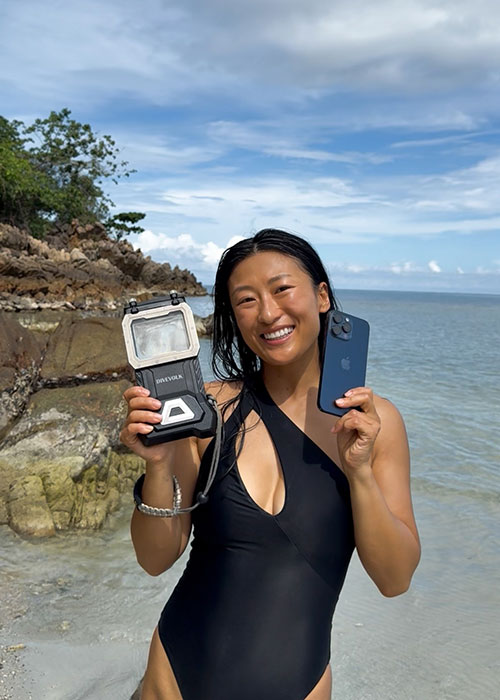
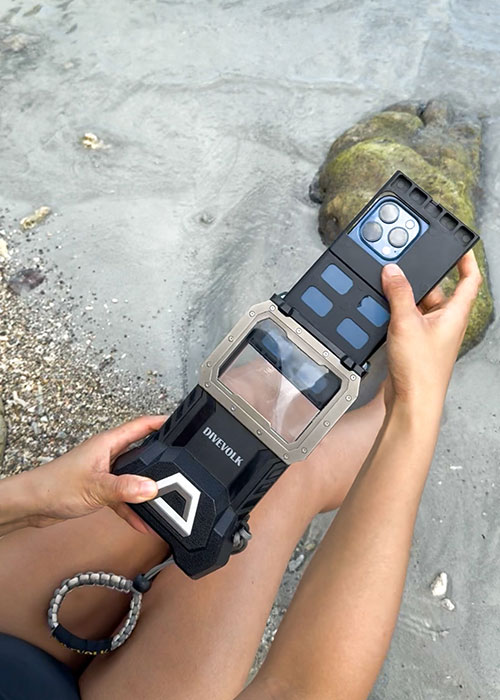
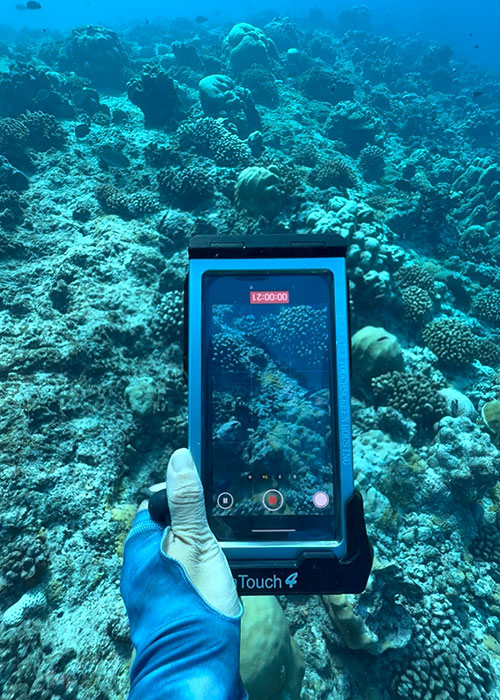
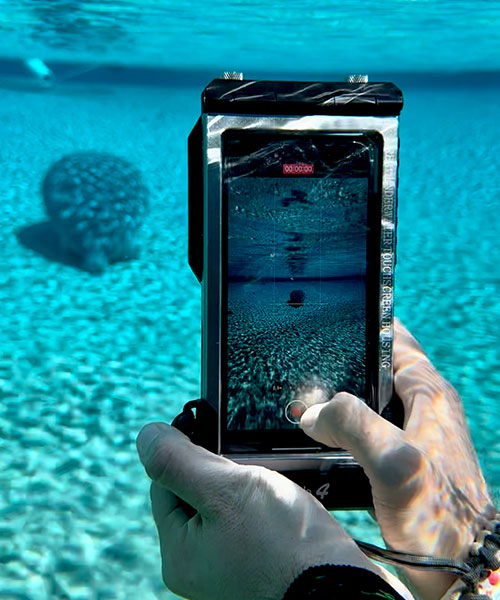
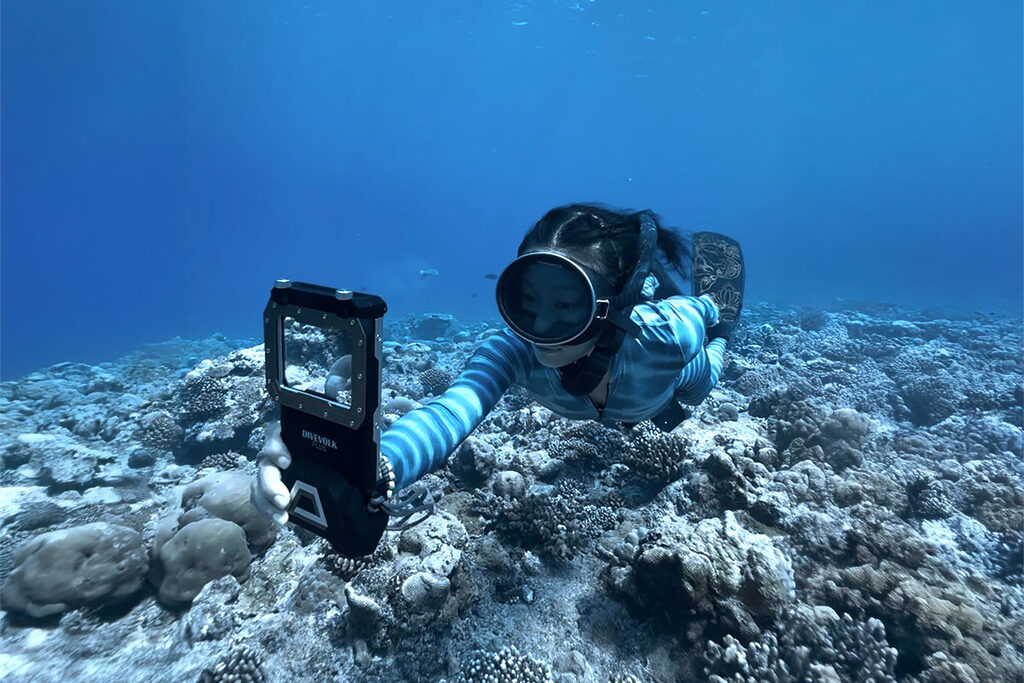
iPhone 16 Pro + DIVEVOLK SeaTouch4MAX Plus
Right now my main set up is the iPhone 16 Pro with the DIVEVOLK SeaTouch 4 Max Plus, and the reason I keep using it is honestly simple, it solves the exact things that usually cause blur in real diving situations. You can use the touchscreen underwater, which is huge because you can tap to focus instead of just hoping the phone focuses on the right thing, and you can also quickly adjust exposure and settings without guessing. On top of that it’s rated for deep diving to 60 meters and it feels solid in the water, and it’s easy to hold steady with one or two hands.
Minimum Kit vs Upgrade Kit, What I Actually Use
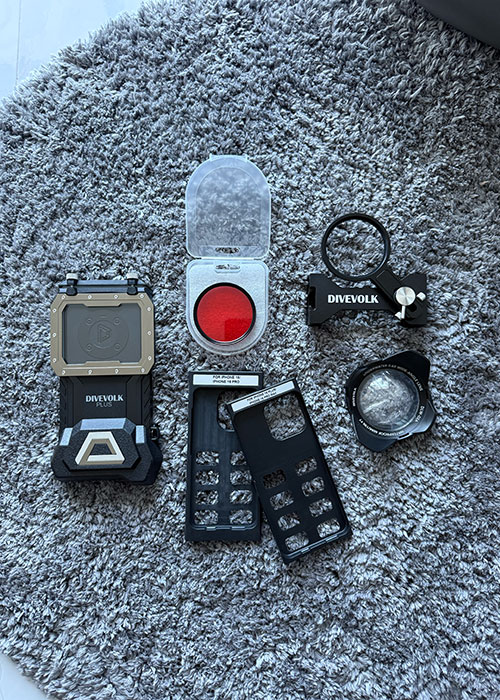
Most of the time I keep it simple with my minimum kit, which is my iPhone 16 Pro, the DIVEVOLK SeaTouch 4 Max Plus, and a wide angle lens. I use the wide angle lens on most dives because it makes footage feel more cinematic and more “3D,” and without it, scenes can look a bit flatter in my opinion.
For red filters, I don’t use them much for freediving because freediving means you’re constantly changing depth, and even a small depth change can shift your colors a lot, so a filter can make shallow shots look too red or purple. But if you’re scuba diving, or you’re filming mostly below around 10 meters or 33 feet, a red filter can be great because your depth stays more stable and your color becomes more predictable.
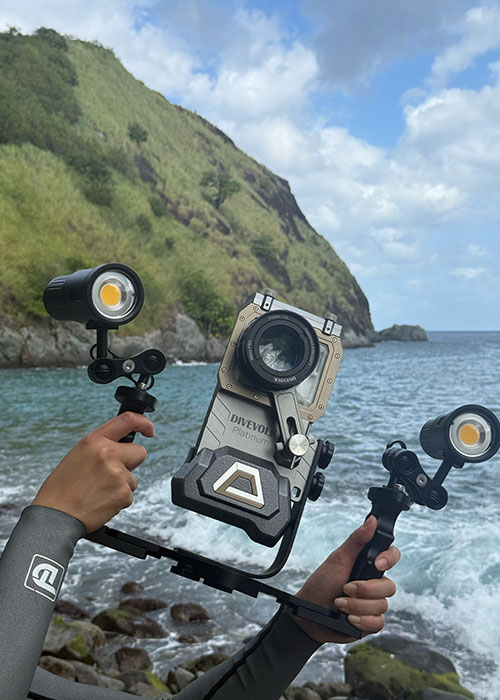
My upgrade kit is the iPhone 16 Pro with the SeaTouch 4 Max Plus plus a red filter and a diving light, and this setup is amazing for scuba but heavier for freediving. I don’t run it often for freediving because it gets bulky, but for scuba or deeper reef dives it’s honestly the most consistent way to get sharp and colorful footage in different conditions, and if you’re into macro, you can also add a +8 or +18 macro lens and switch underwater using a lens pocket, which is super fun for tiny critters.
DIVEVOLK Discount Code
I’ve been using the DIVEVOLK SeaTouch 4 Max Plus for over 3 years, and I’ve tested it on countless dives in different water conditions. If you want to see a full review of this underwater phone case, I wrote everything in this article:
👉 Divevolk SeaTouch 4 Max Plus Full Review
If you’re ready to order now through my personal DIVEVOLK discount link and use the DIVEVOLK discount code DIVETIAN6, you’ll get:
- 6% off your entire order
- a free Protective Cover (perfect for flights and dive trips)
And if your order is over $500, you’ll also receive:
- a free Travel Case
- a free L-shaped handle bracket
These are the same accessories I use on my own rig and they’re genuinely useful for travel and stability underwater.
👉Use code: DIVETIAN6 at checkout
👉Order directly from DIVEVOLK
The extra freebies usually won’t show on the checkout page, but they will be automatically added to your order by DIVEVOLK.
FAQ
Why is my underwater iPhone video blurry but photos are okay?
This one is super common, and it doesn’t mean your phone is broken. Video is recording constantly and it’s also compressing the footage at the same time, so when the light is low underwater, the iPhone often pushes ISO up and smooths noise in the background, and that’s when video starts looking softer. Photos can look sharper because the iPhone has more time to process a single frame, and it can “stack” and sharpen it more aggressively, so the result can look cleaner even in the same conditions.
Should I use 0.5x underwater?
Yes, but only if you’re close enough. Ultra-wide can look amazing underwater for big subjects and reef scenes, but if you’re far away, it doesn’t solve the problem, it actually makes it worse because everything looks smaller and you’re filming through more water, which means more haze.
Does a red filter fix blur?
No, a red filter helps color, not sharpness. If your footage is blurry, it’s usually because of distance, focus, motion, fogging, or low light, and those are the things you want to fix first. Think of the red filter as a color tool, not a magic fix for soft footage.
Can you fix blur in editing?
A little bit, but only to a point. You can add contrast and a touch of sharpening, and that can make decent footage look nicer, but if the clip is truly out of focus or fogged, editing won’t save it. Editing is more like polishing something that’s already okay, not rescuing something that was blurry from the start.
If you want a simple guide on how to color grade the underwater videos on your phone, here’s my quick guide: How To Edit Underwater Videos On IPhone: Color Grading In 5 Mins
What’s the easiest upgrade for sharpness?
Honestly, technique first, then gear. Getting closer, stabilizing your body, and tapping to focus fixes more than most people think, and you can do that immediately without buying anything new.
Save this checklist for your next underwater shoot
If you just want the short version, like the real underwater video blurry fix that actually makes a difference, it comes down to a few simple things you can check every single time.
- Get close. Use 1x or 0.5x, but don’t try to film through 5 or 6 meters of water and expect it to look crisp.
- Tap to focus (all the time, especially for moving subjects).
- Clean + de-fog your phone lens and housing window before the dive.
- Understand light. Low light is when everything turns mushy, so shoot shallower when you can or add a light.
- Don’t rely on editing to fix bad focus or fog.
If you want my exact underwater phone case and settings workflow, you can follow these guides depending on what you’re trying to improve:
👉 Best IPhone Settings For Underwater Photos & Videos
👉 8 Beginner Mistakes To Avoid
👉 How To Edit Underwater Videos On IPhone
👉 How To Create Underwater Content For Instagram & TikTok
👉 How To Take Underwater Photos With IPhone