If you’ve ever come up from a dive feeling so sure you captured something beautiful, then watched the clip back and thought, “Why is everything green, shaky, foggy, and kind of… out of frame?” you’re not alone. Most beginners assume their phone just isn’t good enough underwater, but honestly, that’s rarely the real problem. That’s exactly why these underwater iPhone video tips are important: your camera is usually fine, it’s the way water changes light and color that messes people up, and nobody teaches you that part when you’re excited and just want to press record.
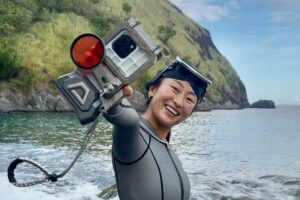
I still remember the first time I tried filming underwater with my iPhone in Bali. I was instantly hooked, because it felt so effortless compared to carrying an action camera setup, and I loved the idea that there was no need to transfer files from one device to another. Over the years (and after a lot of clips I’ll never post), I started collecting small, practical tricks that make a huge difference, especially if you’re freediving, holding your breath down there and you don’t have time to fight your settings or redo a shot ten times.
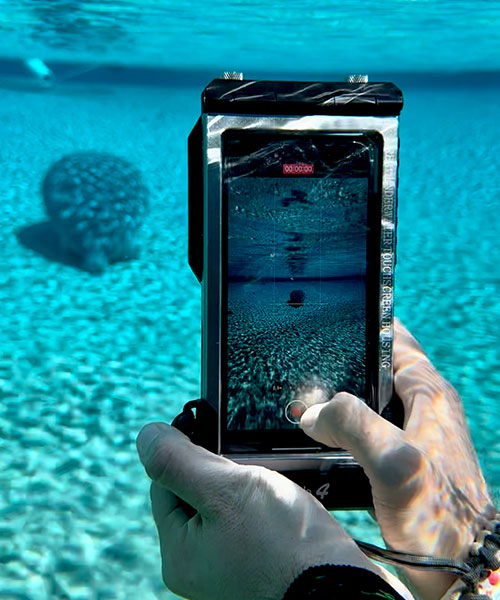
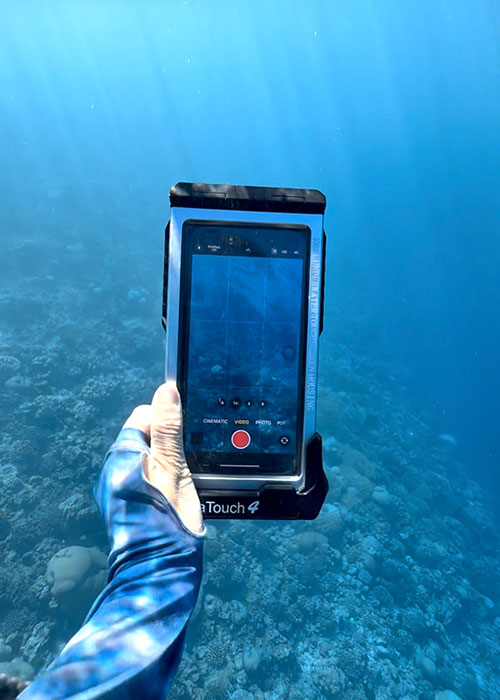
Smartphone underwater photography has exploded recently for a reason: with full touchscreen phone housings like the ones from DIVEVOLK, you can actually use your phone properly underwater instead of being locked into a few buttons and hoping for the best. That convenience is really a game changer, but it also means more people jump in, hit record, and run into the exact same beginner mistakes.
Quick gear note: I use a full touchscreen underwater phone case from DIVEVOLK so I can actually control focus, exposure, and settings underwater. If you want my full honest review + setup tips, start here: 👉Divevolk SeaTouch 4 Max Plus Full Review Use DIVEVOLK discount code DIVETIAN6 for 6% off + freebies.
And here’s the good news: most “bad underwater phone footage” isn’t caused by a bad phone, it’s caused by a few very fixable habits that almost everyone has in the beginning (including me). Colors disappear fast underwater, especially reds and oranges and the deeper you go, the less color in your footage will be. That’s just so normal, and there are easy tricks to fix that.
Underwater iPhone video tips: In this guide, I’ll walk you through the most common beginner mistakes when filming underwater with a phone, why they happen, and exactly how to fix them with simple changes you can use on your very next dive. Once you fix just a few of these fundamentals, your footage will look dramatically better before you upgrade anything.
Mistake #1: Expecting Your Phone to Work Underwater Like It Does on Land
This is the beginner mistake that quietly ruins the most footage, not because you’re doing something “wrong,” but because water just behaves differently than air. A lot of people expect their clips to look perfect straight out of the water with no editing, then they’re shocked when everything turns green or overly blue, the subject drifts in and out of focus, and the footage looks nothing like the scene they just experienced.

Here’s why: your phone is making decisions based on the light it thinks it’s seeing. The light underwater isn’t playing by the same rules. Water filters out colors fast (reds and oranges disappear first), and it creates reflections and shimmer that can trick your camera’s algorithm. Your autofocus might keep “hunting” because it can’t decide what the real subject is, especially when there are particles in the water or a busy background. Auto white balance can swing wildly because the phone keeps trying to correct the dominant blue/green tones, and every small change in depth or angle makes the whole color temperature shift again. That’s why sometimes you see your footage suddenly change from blue to green during one dive.
And once you understand that, a lot of the frustration makes sense… and you can start working with the water instead of fighting it.
If you want to go deeper, these two guides will help:
👉 How To Take Underwater Photos With iPhone
👉 Best iPhone Setting For Underwater Photos And Videos
Mistake #2: Expecting your phone footage looks perfect without editing
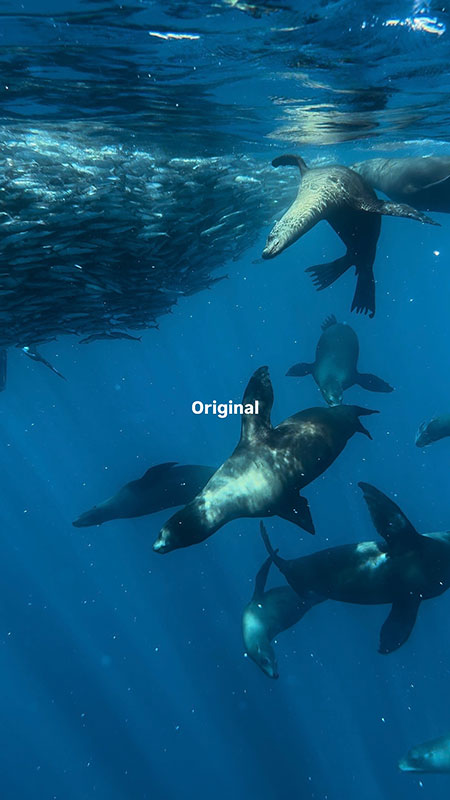
This one is so common, and I totally get why people expect it. When you see other people’s underwater photography on Instagram, you would expect that when you press that record button, everything will come out just like that kind of result. But the truth is, most content creators (like myself) and underwater photographers only post their edited footage.
Water steals contrast and color. Even in clear blue water, your clips can come out flat, washed out, or tinted green/blue, because your phone can’t capture the full range of colors the way your eyes experience them underwater. And as soon as you add depth, particles, or mixed lighting (sunlight + shadows + surface shimmer), your camera has even less to work with. So what you get is often a very honest file: it’s the raw underwater look. Not bad, just unfinished.
A lot of beginners get discouraged here and assume they need a better phone, a better case, a better filter, a better everything, when what they actually need is a quick edit to bring the footage back to what it felt like. I wrote a simple step-by-step guide here: 👉 How To Edit Underwater Photos And Videos On Your Phone: Color Grading In 5 Mins
Mistake #3: Getting Too Far Away From the Subject

Distance is everything underwater. It’s not just “how big your subject looks in the frame” instead, distance decides your sharpness and your color. The farther away you are, the more water sits between your phone and the subject, and that water is basically a filter that steals detail, contrast, and the warm tones first. So even if you’re filming with the latest iPhone, if you’re too far back, your footage will almost always look softer, flatter, and more blue/green than you remember.
This is probably the most common beginner habit I see: floating on the surface, pointing the phone straight down, and trying to capture a whole “wide scene” from far away: reefs, fish, your buddy, everything at once. It feels safe and easy because you don’t have to dive down, and you get a big view… but the result usually is not what we want. You know the kind: the ocean looks huge, but the subject looks tiny, and the clip doesn’t have that “wow, I’m really there” feeling.
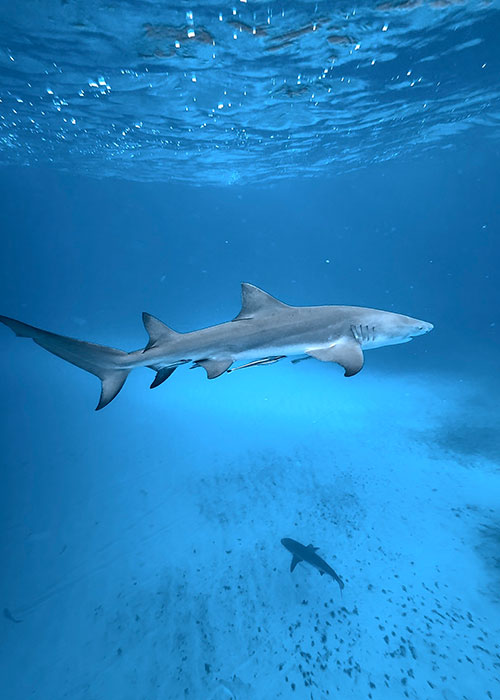
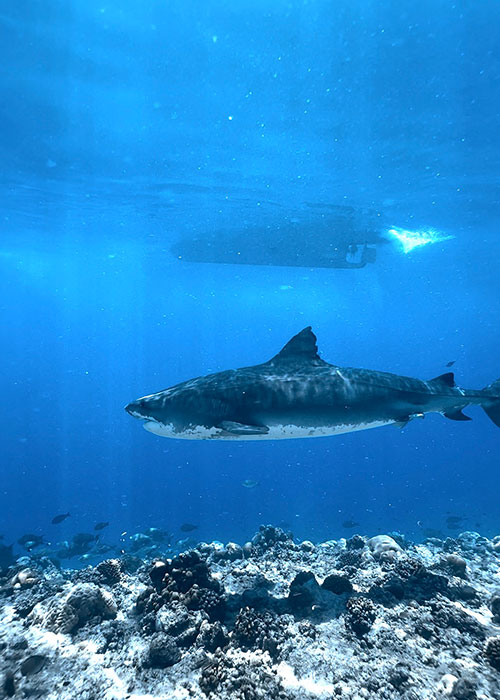
What most people don’t realize is that the fix isn’t a new phone, it’s simply getting closer (and sometimes getting a little deeper). Even dropping down just a few meters can make your footage look completely different, because you’re changing the angle, reducing surface glare, and cutting the amount of “water filter” between you and the subject. When the conditions are decent, I personally love diving down around 3–5 m / 10–16 ft, doing a gentle exhale so I don’t pop back up, and filming on 0.5x to get that immersive, wide look without being far away. The scene suddenly feels cleaner, more colorful, and way more intentional.
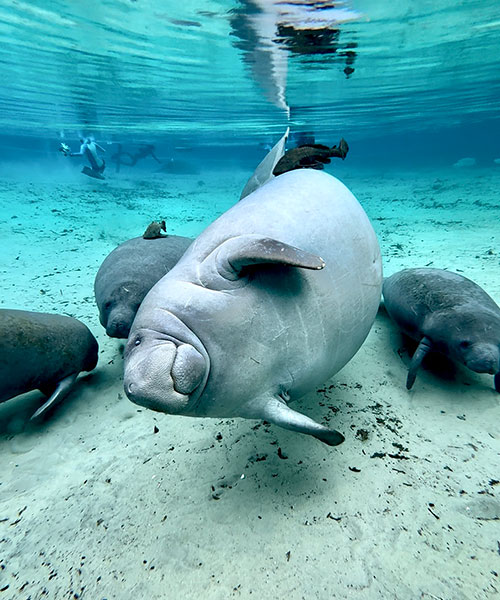
And this isn’t just a reef thing. The “distance rule” applies to photos and videos, to corals and animals. If you want details, color, and that crisp cinematic look, distance is the first thing to pay attention to, before you stress about anything else.
If you want a full breakdown of how I actually plan shots underwater (movement, framing, angles, and how to make clips look good for social media), I wrote it all here: 👉 How To Create Underwater Content (Photos & Videos) For Instagram & TikTok.
Mistake #4: Moving Too Fast While Filming
This mistake is so easy to make, especially in the beginning, because underwater you’re doing a lot at the same time. You’re kicking, adjusting your position, trying to stay neutral, watching your buddy, watching the subject, thinking about equalize the ear… and then you add filming on top of that. Most people don’t realize how quickly all those tiny movements turn into shaky footage on a phone.
A classic scenario: you’re descending, you still need to equalize, so one hand is pinching your nose, and the other hand is trying to hold the phone and frame the shot. At the same time, you’re not deep enough yet (or you’re underweighted), so you’re constantly floating up a little and correcting yourself. You’re basically filming while your body is doing micro-battles with buoyancy… and of course the result looks shaky. It’s not because you’re “bad at filming.” It’s because you’re trying to shoot while you’re not stable.
This is why I almost never try to “film while equalizing.” I can’t hands-free equalize either, so what I do is simple: I hit record first, then I descend to the depth where I’m comfortable and no longer equalizing every second. Once I’m at a depth where my body feels naturally buoyant and stable, I hold the phone with both of my hands, and move slowly, stay as still as I can and let the subject move through my frame, if I do need to kick a little, I will do it very gently too. Later on I will cut out the parts when I feel like I can use the video, and leave the part “I am descending” out.
Mistake #5: Trying to Capture Everything Instead of One Clear Subject
This is one of those mistakes that doesn’t feel like a mistake while you’re underwater. You see a beautiful reef, a fish swims by, your buddy is in the background, the sun is sparkling above you and your brain goes, I want all of it. So you point your phone at the whole scene and just keep recording, hoping the magic will somehow translate.
But when you watch it back, the clip feels messy. There’s no clear “main character.” Your eyes don’t know where to look, the subject looks small, and the video ends up feeling more like a random memory than a story.
Beginners do this all the time, and it makes sense, you’re excited, you don’t want to miss anything, and underwater moments are fast. The problem is: a phone frame is small, and underwater already has a lot going on. If you try to fit everything into one shot, you usually end up with nothing that feels strong.
This is also where it helps to have a simple thought in your head before you start filming: What is this video for? You don’t need to overthink it but having that one intention changes everything. Once you start thinking that way, it becomes easier to simplify: pick one clear subject per clip. One fish. One coral detail. One diver. One ray passing through the frame. And let everything else support that moment instead of competing with it.
Now the next question is the most important one: how do you actually frame the shot so it looks clean and intentional? That “framing” detail is where underwater videos start to look cinematic, and I use that method for all of my underwater content. I’ll break it down step-by-step in my next article.
Mistake #6: Shooting Without Thinking About the Final Platform
This mistake usually starts with a very innocent thought: “I’ll just film it now and figure it out later.” And honestly, I’ve done that so many times. The problem is, “later” often means you’re sitting on a great clip… that suddenly becomes almost unusable the moment you try to post it.
The most common version: you shoot everything horizontal, then later you decide you want to upload it to Instagram or TikTok, so you crop it into vertical. On your phone screen it might still look “okay,” but the moment you crop, you’re basically throwing away a big part of your image. Your subject becomes smaller, your framing gets weird, and if you add text, it turns into tiny subtitles nobody wants to squint at. Then you post it, and you wonder why the quality looks like it collapsed… or why people swipe away so fast even though the underwater moment was actually beautiful.
And here’s the part nobody wants to hear: on Instagram and TikTok, attention is a vertical game. People are holding their phones upright, scrolling fast, and deciding in one second if your video is worth their time. If a clip shows up in horizontal, most viewers (including me) don’t feel invited to “lean in.” The subject looks small, the text looks small, and it takes effort to understand what’s happening,so people just keep scrolling. It doesn’t mean your content is bad. It means your format is fighting the platform.
So if you’re filming mainly for Instagram and TikTok, I strongly recommend shooting vertical most of the time. That’s how people watch, and it instantly makes your shots feel more immersive on social media. Horizontal clips can absolutely look stunning too, they’re just usually more useful for platforms like YouTube, longer edits, or if you’re building a library for a blog (like I do), where wide shots can be valuable for storytelling and context.
The point isn’t to stress about it underwater or overthink every clip. Just keep one simple question in the back of your mind before you hit record: What am I going to use this for later? That tiny bit of intention will save you from painful cropping, blurry uploads, and “why does this look worse on Instagram than on my camera roll?” moments.
If you want a full breakdown of how I shoot underwater specifically for social media (what I film, how I plan clips, and what works best for IG/TikTok), I wrote it all here: 👉 How To Create Underwater Content For Instagram & TikTok.
Mistake #7: Over Editing or Over Color Grading Underwater Footage
This one usually happens after you’ve already fixed a few beginner mistakes and you start getting serious about your footage. You finally come back with clips that are sharp and usable… and then you open your editing app and think, Okay… now I’m going to make this look insane.
And that’s where people often go a little too far.
Underwater footage is tricky because it needs some help, water naturally steals warmth, contrast, and clarity, so editing is not “cheating.” It’s part of the process. But when you push the color too hard, the video can start looking unnatural fast: greens turn neon, blues become electric, skin tones look weird, corals look like candy, and the whole scene loses that calm, real underwater feeling. Same with contrast, if you crank it too much, you can end up with harsh shadows, crunchy textures, and a look that feels more like a filter than an ocean moment.
When you’re a beginner, the best skill you can learn isn’t “how to make it dramatic.” It’s how to color grade efficiently, how to quickly restore natural color, balance the tones, and make your clips look clean without overdoing it. You’ll film with more confidence because you’ll know what you can fix later, and you’ll also know where the line is before your edit starts looking fake.
If you want my simple, realistic approach (the one I use), I break it down step-by-step here: 👉 How To Color Grade Your Underwater Photos and Videos In 5 Mins
Mistake #8: Thinking You Need Better Gear Instead of Better Technique
This is the moment a lot of beginners hit after a few dives: you look at your footage, you’re not happy with it, and your brain immediately goes, Okay… I need a better phone. Or a better camera. Or maybe a new case. Maybe a filter. Maybe a whole new setup.
It’s such a normal reaction, because gear feels like the fastest fix.
But honestly? In my experience, most underwater phone footage doesn’t look “bad” because the phone isn’t capable. It looks bad because a few fundamentals aren’t dialed in yet. And the funny thing is, these fundamentals don’t cost money, they cost attention.
If I had to summarize it, I’d say 80% of the problems beginners run into usually come from just four things:
- Distance (you’re too far, so everything looks flat and blue/green)
- Stability (tiny movements turn into shaky footage fast on a phone)
- Light (wrong angle, surface glare, mixed lighting, shadows)
- Settings (your phone making “auto” decisions that don’t work underwater)
Your iPhone or Android phone is totally enough to get beautiful underwater content. I shoot everything with an iPhone 16 Pro, and if you want to see what’s actually possible with a phone underwater, you can check out my Instagram here.
If you want my exact setup and the settings that make filming underwater feel way more predictable, I also wrote a full guide here: 👉 Best iPhone Setting For Underwater Photos and Videos.
Final Section: Fix the Mistakes First, Then Think About Gear
If your underwater videos haven’t been looking the way you imagined, I want you to hear this clearly: it’s not because you’re “bad at filming,” and it’s definitely not because your phone isn’t good enough. Underwater is just a different environment, and it has a learning curve for everyone.
The good news is, you don’t need to master everything at once. If you fix just the first 3 mistakes in this guide, your footage will already look 10x better. Once you start getting consistent results, that’s when upgrading gear actually makes sense, because you’ll know exactly what you’re trying to improve. If you only remember one thing from these underwater iPhone video tips, let it be this: fix the fundamentals first, then worry about gear.
If you want to keep building your underwater phone skills, here are the guides that will help you go deeper (in the most practical way):
👉 How To Take Underwater Photos With iPhone
👉 How To Create Underwater Content (Photos & Videos) For Instagram & TikTok
👉 How To Edit Underwater Videos On iPhone: Color Grading In 5 Mins
👉 Best iPhone Settings For Underwater Photos & Videos
I film all of my underwater iPhone videos using a full touchscreen housing from DIVEVOLK. If you want to see my exact setup + pros/cons, I wrote the full review here: 👉 Divevolk SeaTouch 4 Max Plus Full Review
If you decide to grab one, you can use the DIVEVOLK discount code DIVETIAN6 for 6% off + freebies (affiliate link).